The campus CloudApps (RedHat Openshift platform) is great for hosting things such as custom NextJs (web) app. Here I will show you how to install the app using a few simple commands.
“Commands? I have to type?” you say. Yes, I am using the command line and not the web console. I will explain why after giving you the commands to push you first example NextJs app to CloudApps. If you are new to the oc CLI, here is a good cheat sheet of commands. (This tutorial assumes you have the OpenShift oc CLI installed on your Windows computer, know how to log into it, and you have a default project already selected by default in the CLI)
Step 1 – Open you command line tool like DOS and log into CloudApps (for this I do actually prefer using the CloudApps web console to copy the login command and paste it into the command line)
Step 2 – Load the example NextJs app into CloudApps using the following command (where ‘ncc’ is simply the name I am telling CloudApps to use for this example app). The code to build the app is hosted at https://github.com/kuhlaid/next-learn-starter/tree/master/learn-starter. The ‘–context-dir’ flag is the way we install code from a subdirectory of GitHub.
oc new-app https://github.com/kuhlaid/next-learn-starter.git –context-dir=learn-starter –name ncc
Step 3 – Now, wait a few minutes. You can run oc logs -f buildconfig/ncc if you want to get the status of the app being built, or check the CloudApps web console if you want to make the web console feel useful.
Step 4 – Once our ‘ncc’ app is installed in CloudApps we need to create a URL (route) to make it accessible in a web browser. To do this we simply use the command:
oc create route edge –service=ncc –insecure-policy=Redirect
If you run the command oc get routes then you should see a URL that begins with ‘ncc’. Copy that URL into a browser and you should see something like:
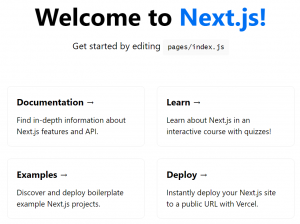
You did it. You installed your first NextJs app on CloudApps.
If you want to delete/remove the app and all the resources created for this app in CloudApps, and start over or make edits to the app before reinstalling it in CloudApps, simply use the command:
oc delete all –selector app=ncc
Why the oc CLI?
Hopefully it is now obvious why the command line interface is better suited than the web console when installing apps (unless you are really against installing the oc CLI software on your computer). “But I have to type commands” you say. My solution is to copy and paste my commands from a text file or OneNote. Also oc commands can be easily explained in a GitHub repository when you want to make it simple for your users to duplicate your build experience. Spending loads of time trying to grab screenshots of the web console to try and explain which buttons to push and where to find hidden menus takes a lot of time. Then when the web console interface changes after you have created all of those complicated instructions, your instructions no longer apply to the new web interface.
It is easier to explain how to build an app using oc CLI commands because there are no changing interface designs to navigate and you can actually save your commands to a text file that can be backed up and archived along with your GitHub repository code.
As a disclaimer, I’m a web interface guy. I would rather click buttons in most cases, but the OpenShift web console is way too complicated for normal everyday users. WAY TOO COMPLICATED and not user friendly. I found when I was trying to use the web console I was writing pages of instructions on how to duplicate an app build, and I still couldn’t keep it straight.
If you are still not convinced the CLI is beter, after you install this example app try to go into the web console and delete all of the app resources of this example in one click. Then reinstall this app using only the web console. I bet you can’t do it. Go ahead, I’ll wait.

 How To Improve Your WiFi Service
 Add contact info to your phone lock screen